 |
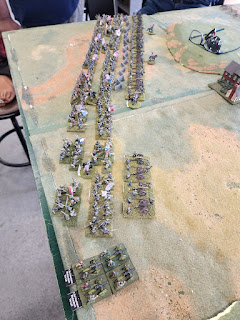
| Pettigrew's Division |
 |
| Pickett's Division |
 |
| Union Right |
 |
| Union Left |
 |
| 8th Ohio |
 |
| Lang's Brigade in front to Garnett's Brigade |
 |
| Artillery, Lang's Brigade and Garnett's Brigades. |
 |
| Garnett's Brigade |
 |
| Joe "Pettigrew" |
 |
| Marty "Baxter" and Odin "Hancock" |
 |
| Steve "Stannard", Ezra "Union Reinforcements" with Statler and Waldorf "Tom and Terry" |
 |
| Pickett's Brigade Rumbles Forward |
 |
| Wilcox's Brigade on the Edge of the World |
 |
| Confederate Right, Kemper and Wilcox's Brigades |
 |
| Confederate Right, Garnett, Lang, Kemper and Wilcox's Brigades |
 |
| Joe "Pettigrew", Jim "Trimble" and Rolf "Smyth" |
Baxter is marching on.
 |
| Confederate Right |
 |
| Confederate Right |
 |
| View Confederate Right from the Center |
 |
| Confederate Artillery Line |
 |
| Confederate Left |
 |
| Confederate Center |
 |
| Confederate Center |
 |
| Armistead's Brigade |
 |
| Confederate Center after Armistead's Brigade marches on. |
 |
| Pettigrew to the Wall. |
 |
| Pettigrew charge was checked. |
 |
| Ending Positions at the allotted end time of our game. |
 |
| A wider shot. |
 |
| From the Confederate Perspective prior to the Start of the Battle. Photo by Joe Knight |
 |
| Pettigrew's Division Photo by Joe Knight |
 |
| Pettigrew's Division Photo by Joe Knight |
 |
| From North looking South Photo by Joe Knight |
 |
| Pettigrew's Division Photo by Joe Knight |
 |
| Union Line Photo by Joe Knight |
 |
| Union Line Photo by Joe Knight |
 |
| Union Line from the South Photo by Joe Knight |
 |
| Union Reinforcements Photo by Joe Knight |
 |
| Pickett's Division Photo by Joe Knight |
 |
| Pickett's Division Photo by Joe Knight |
 |
| Union Line Photo by Joe Knight |
 |
| Pettigrew's Division Photo by Joe Knight |
 |
| Trimble's Division Photo by Joe Knight |
 |
| Pettigrew and Trimble's Divisions Photo by Joe Knight |
 |
| Pettigrew and Trimble's Division Photo by Joe Knight |
 |
| Looking South Photo by Joe Knight |
 |
| Pettigrew Closes Photo by Joe Knight |
 |
| Pickett's Charge Photo by Joe Knight |
 |
| Pettigrew's Charge Photo by Joe Knight |
 |
| Pettigrew and Trimble's Division Photo by Joe Knight |
 |
| Looking south at the end of our game. Photo by Joe Knight |
 |
| Looking South Photo by Joe Knight |
